Create an Azure App Registration

Published On: July 8, 2020Last Updated: January 2, 2024By Tags: , 3.9 min readViews: 747

What can you use an Azure App Registration for


An Azure App Registration has many uses, in my case I use it mainly for the Microsoft Graph API to perform Intune Configuration Profile backups, List devices, Update local CMDB dynamically and also enrol devices into Autopilot.


You will see the vast amount of options you can use for the API when you start adding the API permissions below.


If you are also using MEMCM and Co-Managing devices with Intune or you have this Azure Tenant attached this will also be using an Azure App Registration to read user details and use user impersonation.


However as you will notice this guide is focused on using the App Registration with the Microsoft Graph API with Client Secrets.

Finding what API Permission is required for your Microsoft Graph API Call
Each API can have a different set of permissions required to be able to read and/or write data. The best way to find these is by using the Microsoft Graph API Reference Guide.


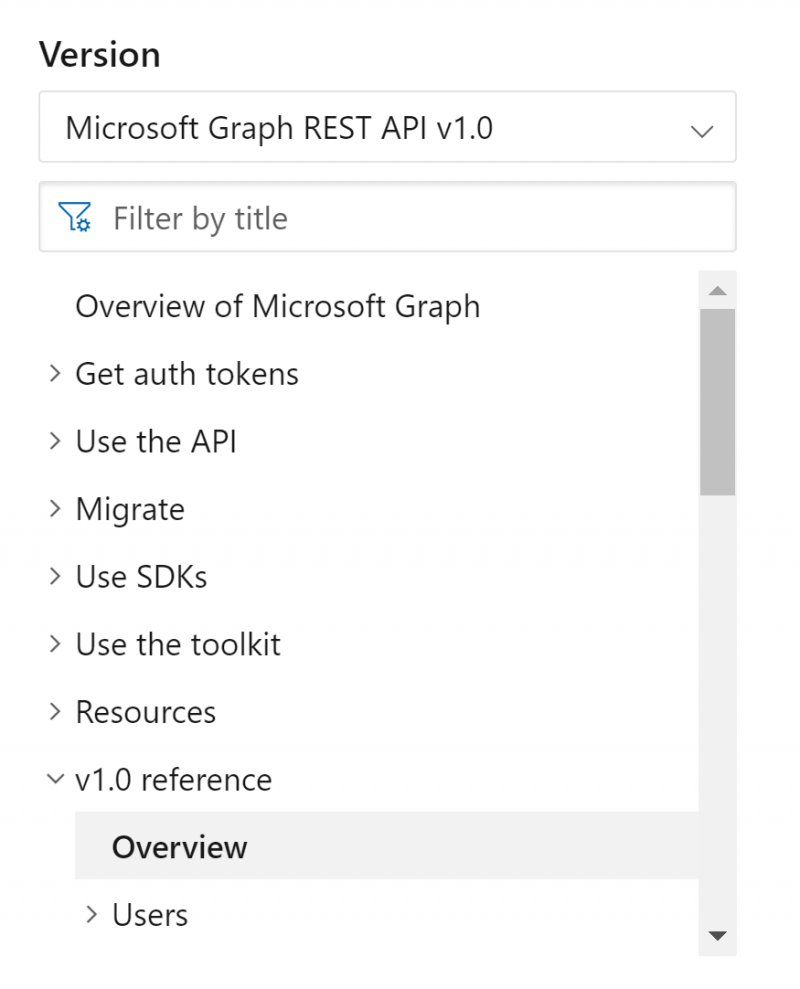
Once you have loaded the API Reference guide, you will notice a list of categories for the API like below.
API Ref v1
For this post I am using the importedWindowsAutopilotDeviceIdentities API reference which is in the Beta API. You can change what API Reference you are using by using the drop down under the Version header in the left-hand pane.


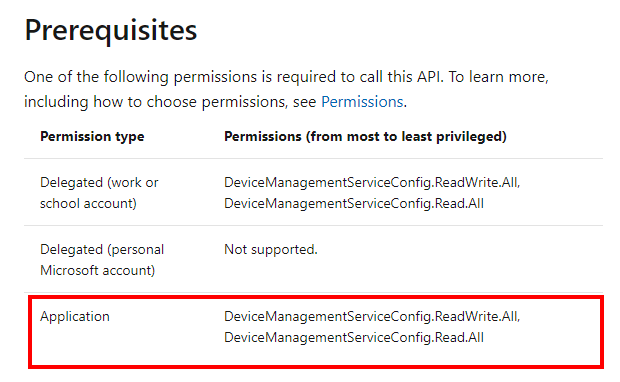
If you browse to Devices and apps > Corporate management > Imported windows autopilot device identity > List, You will see under the prerequisites which permissions that particular API requires as highlighted below.
Note
I will be using the Application permissions as the App this was created for is unattended
List PreReq 1
You will notice that even though you are only listing devices that the ReadWrite permission is listed in the permission set. If you look closer at the permission table headers you will see it states Permissions (from most to least privileged) meaning that to use the full functionality of this API (such as Create, Delete and Update) you will need the ReadWrite permission, However if you just wanted to list the data you would only need the least amount of privileges which is Read.
Have a browse around and notice the differences in different categories before moving on.

Creating the Azure App Registration

Head over to the Azure Portal and launch Azure Active Directory.
From the pane on the left select App Registrations, from here you can either choose to use an existing registrations or create one for this specific purpose. I would however recommend that you use a specific one for this purpose, this way the app does not have more permissions than it requires.
Lets get started;
  • Click New Registration from the ribbon
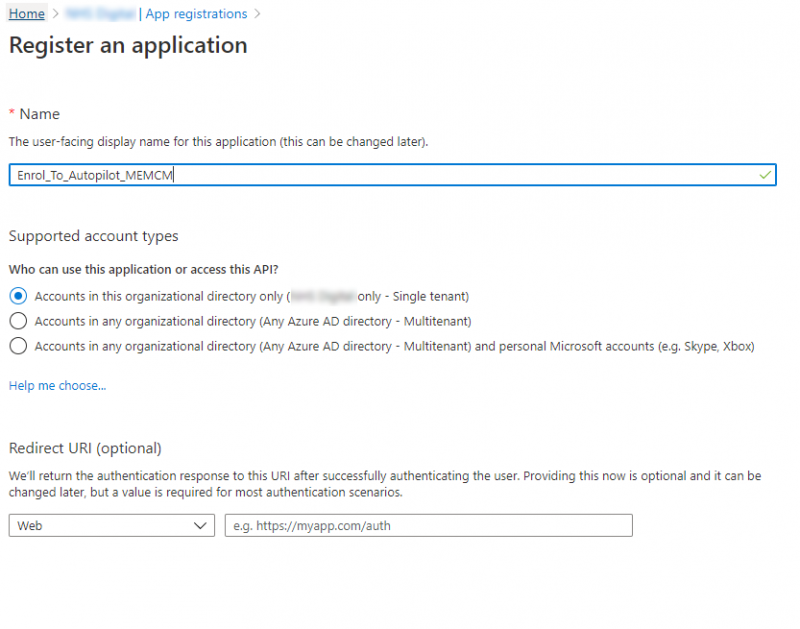
  • Give the App a name that represents its purpose and leave the rest as default and click Register
RegisterAppPage
  • From the left pane, select API Permissions, This is where we are going to grant the App the permission to the Microsoft Graph API
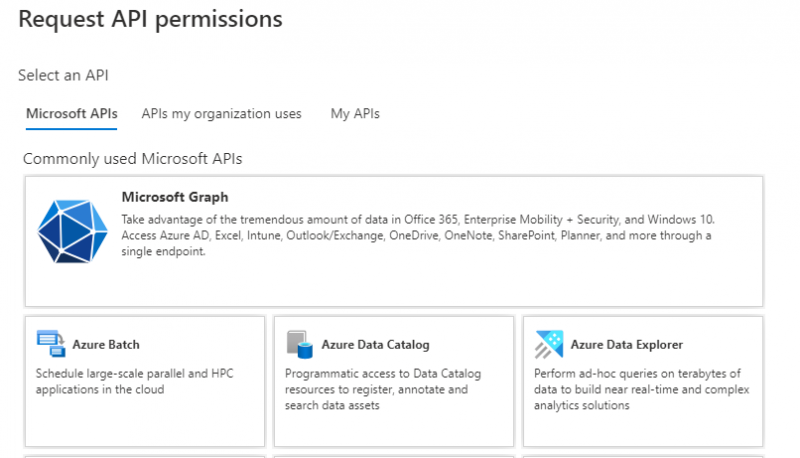
  • Select Add a permission from the ribbon, you will see a pop out like the below;
RequestAPIPerm
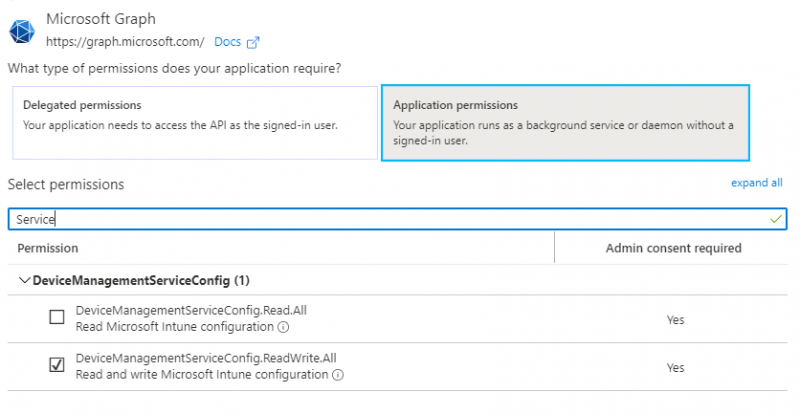
  • Click on Microsoft Graph > Application Permissions
  • In the search box type Service and this will show the permissions we require
ServiceConfig 1
  • Click Add Permissions
  • You will then see a orange banner stating that the permissions are being edited and consent will need to be given
PermissionBanner
  • Click the Grant admin consent for, click Yes on the banner to confirm your would like to grant consent
GrantPerm 1024x202 1
  • Next we need a client secret… you will need to store this in a safe place as once you click of the page its hides all but a few characters. Click Client & Secrets from the pane on the left
  • Click New Client Secret
    • Specify a description, if you are going to put this in numerous locations and let multiple people use it you could relate it to that team/department. But for this example we will keep it simple.
    • Specify a validity period, you have three options, 1 year, 2 years or never. I would not recommend using the later and would ensure that you have processes in place to review the application
ClientSecret
  • When you have added the secret, copy the value as you will need this later.

To go with the client secret you will also need the Application (Client) ID and the Directory (tenant) ID. These can be found on the Overview page.

CLientID AppReg

The details you have gathered from this article you can use them to perform unattended actions on the Microsoft Graph API and other services. I will be posting some other blog posts which relate to using these details so keep an eye on the blog for interesting ways to use the App Registrations.

Create an Azure App Registration

Published On: July 8, 2020Last Updated: January 2, 2024By Tags: , 3.9 min readViews: 747

What can you use an Azure App Registration for


An Azure App Registration has many uses, in my case I use it mainly for the Microsoft Graph API to perform Intune Configuration Profile backups, List devices, Update local CMDB dynamically and also enrol devices into Autopilot.


You will see the vast amount of options you can use for the API when you start adding the API permissions below.


If you are also using MEMCM and Co-Managing devices with Intune or you have this Azure Tenant attached this will also be using an Azure App Registration to read user details and use user impersonation.


However as you will notice this guide is focused on using the App Registration with the Microsoft Graph API with Client Secrets.

Finding what API Permission is required for your Microsoft Graph API Call
Each API can have a different set of permissions required to be able to read and/or write data. The best way to find these is by using the Microsoft Graph API Reference Guide.


Once you have loaded the API Reference guide, you will notice a list of categories for the API like below.
API Ref v1
For this post I am using the importedWindowsAutopilotDeviceIdentities API reference which is in the Beta API. You can change what API Reference you are using by using the drop down under the Version header in the left-hand pane.


If you browse to Devices and apps > Corporate management > Imported windows autopilot device identity > List, You will see under the prerequisites which permissions that particular API requires as highlighted below.
Note
I will be using the Application permissions as the App this was created for is unattended
List PreReq 1
You will notice that even though you are only listing devices that the ReadWrite permission is listed in the permission set. If you look closer at the permission table headers you will see it states Permissions (from most to least privileged) meaning that to use the full functionality of this API (such as Create, Delete and Update) you will need the ReadWrite permission, However if you just wanted to list the data you would only need the least amount of privileges which is Read.
Have a browse around and notice the differences in different categories before moving on.

Creating the Azure App Registration

Head over to the Azure Portal and launch Azure Active Directory.
From the pane on the left select App Registrations, from here you can either choose to use an existing registrations or create one for this specific purpose. I would however recommend that you use a specific one for this purpose, this way the app does not have more permissions than it requires.
Lets get started;
  • Click New Registration from the ribbon
  • Give the App a name that represents its purpose and leave the rest as default and click Register
RegisterAppPage
  • From the left pane, select API Permissions, This is where we are going to grant the App the permission to the Microsoft Graph API
  • Select Add a permission from the ribbon, you will see a pop out like the below;
RequestAPIPerm
  • Click on Microsoft Graph > Application Permissions
  • In the search box type Service and this will show the permissions we require
ServiceConfig 1
  • Click Add Permissions
  • You will then see a orange banner stating that the permissions are being edited and consent will need to be given
PermissionBanner
  • Click the Grant admin consent for, click Yes on the banner to confirm your would like to grant consent
GrantPerm 1024x202 1
  • Next we need a client secret… you will need to store this in a safe place as once you click of the page its hides all but a few characters. Click Client & Secrets from the pane on the left
  • Click New Client Secret
    • Specify a description, if you are going to put this in numerous locations and let multiple people use it you could relate it to that team/department. But for this example we will keep it simple.
    • Specify a validity period, you have three options, 1 year, 2 years or never. I would not recommend using the later and would ensure that you have processes in place to review the application
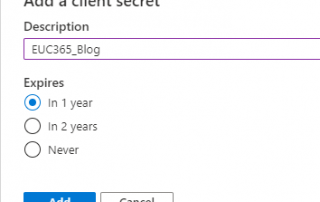
ClientSecret
  • When you have added the secret, copy the value as you will need this later.

To go with the client secret you will also need the Application (Client) ID and the Directory (tenant) ID. These can be found on the Overview page.

CLientID AppReg

The details you have gathered from this article you can use them to perform unattended actions on the Microsoft Graph API and other services. I will be posting some other blog posts which relate to using these details so keep an eye on the blog for interesting ways to use the App Registrations.