Windows 365 Custom Images – Part 1 – The Foundations
Welcome along for the ride as we talk about Windows 365 Custom Images, and how we can use Azure Image Builder to create these images. In the upcoming series of posts, we will cover the following topics;
- Part 1 – The Foundations (This Post)
- Part 2 – PowerShell Deployment
- Part 3 – DevOps Deployment
- Part 4 – Azure Virtual Desktop UI Deployment
In this post we are going to discuss the foundations & requirements for creating a custom images, it is intended that this post is read first before moving onto the other parts of the series to ensure you fully understand the required components and how they work together. So without any further ado, let’s get started.
Permission Requirements
This first part of the series will cover the requirements for the Azure Infrastructure and the Azure Image Builder prerequisites, and as such will require the following permissions;
- Owner permissions on the target Azure Subscription.
Really, nothing more than that for creating the infrastructure.
What is Azure Image Builder?
Well the answer is… not a lot and certainly nothing manually. This section is to first of all highlight what will be done in the Infrastructure setup script, and then we will go through the steps to execute the script. No one wants to blindly run it without knowing what it is doing…. Right?… Right?…
What will we need to create for the Foundations?
Azure Image Builder is a service that allows you to create custom images in Azure, this is based on HashiCorp Packer. Until recently, Image Templates had to be specified in either ARM (Azure Resource Manager) Templates, BICEP or you could use PowerShell to create your image. However, as of May 2023 there is a new kid on the block, you can now create images in the Azure Portal… see [Part 4] for more information on this.
Azure Resource Group
This will come of no surprise to many, but we will need a resource group to store all of the resources we will create. This will be created in the subscription of your choice, and will have the name you specify with the -aibRG parameter. This will also be used to scope the permissions for the User Managed Identity and the Custom Role.
Custom Azure Role
Azure Image builder requires some specific permissions to be able to manage different aspects of the deployment. Rather than giving it full access to the subscription, we will create a custom role that will be scoped to the resource group we created above.
The role will have the following permissions;
- Microsoft.Compute/galleries/read
- Microsoft.Compute/galleries/images/read
- Microsoft.Compute/galleries/images/versions/read
- Microsoft.Compute/galleries/images/versions/write
- Microsoft.Compute/images/write
- Microsoft.Compute/images/read
- Microsoft.Compute/images/delete
- Microsoft.ManagedIdentity/userAssignedIdentities/assign/action
See the Microsoft Documentation for more information on the permissions.
The Microsoft.ManagedIdentity/userAssignedIdentities/assign/action is not defined in the documentation, but is required when using Azure DevOps for Deployments using this solution.
User Managed Identity
The Azure Image Builder service requires a User Managed Identity to be able to perform the actions required to create the image. This will be created in the resource group we created above, and will be given the name of the resource group with the suffix of -UMI, unless you specify something different with the -identityName parameter.
Once the User Managed Identity has been created, it will be assigned the custom role we created above.
Azure Resource Providers
To support the provisioning of the Azure resources within your subscription, the following resource providers will need to be registered;
- Microsoft.Compute
- Microsoft.Storage
- Microsoft.VirtualMachineImages
- Microsoft.Network
- (Optional) Microsoft.KeyVault – This is only required if you are using a Key Vault to store your secrets.
Documentation can be found on this LINK.
Deploying the Foundations
Now we understand what the script will do, let’s go through the steps to execute the script. The script can be found on my GitHub repository, and can be downloaded from the link below;
The Create-AIBInfrastructure.ps1 script, once executed will install the required PowerShell modules, and then prompt you to login to Azure.
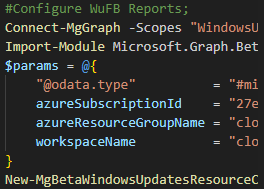
Below is an example of the parameters that can be used to execute the script;
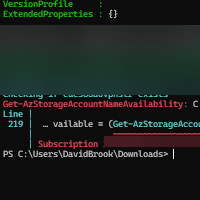
Once the script is executed, you will start to see the resource information in the console;
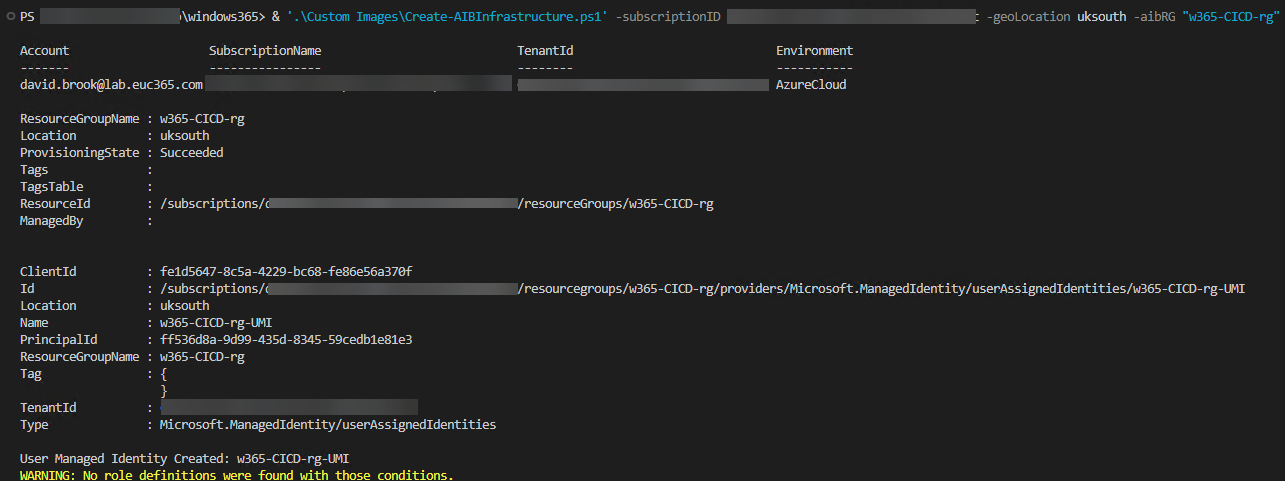
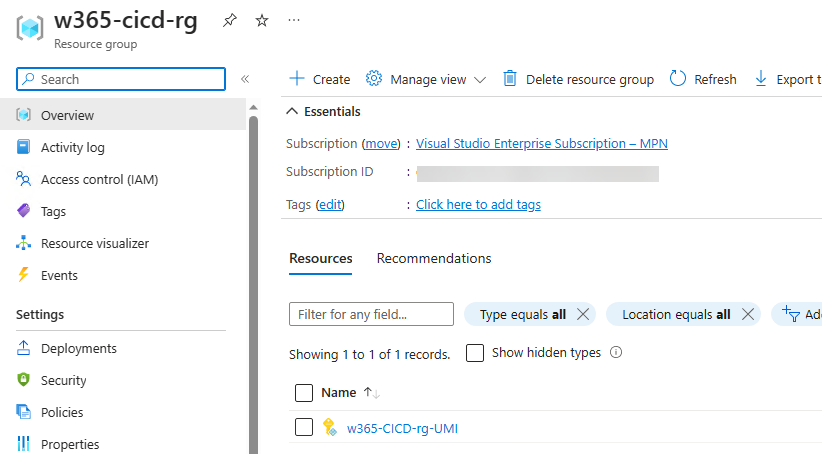
Once the execution has complete you will have a resource group with the Custom Roles & the User Managed Identity with the Custom Role assigned to it.
Conclusion
Stick around and check our the other parts of the series noted in the introduction, and if you have any questions or comments, please feel free to reach out to me on Twitter or leave a comment below.
Categories
Tags

Windows 365 Custom Images – Part 1 – The Foundations
Welcome along for the ride as we talk about Windows 365 Custom Images, and how we can use Azure Image Builder to create these images. In the upcoming series of posts, we will cover the following topics;
- Part 1 – The Foundations (This Post)
- Part 2 – PowerShell Deployment
- Part 3 – DevOps Deployment
- Part 4 – Azure Virtual Desktop UI Deployment
In this post we are going to discuss the foundations & requirements for creating a custom images, it is intended that this post is read first before moving onto the other parts of the series to ensure you fully understand the required components and how they work together. So without any further ado, let’s get started.
Permission Requirements
This first part of the series will cover the requirements for the Azure Infrastructure and the Azure Image Builder prerequisites, and as such will require the following permissions;
- Owner permissions on the target Azure Subscription.
Really, nothing more than that for creating the infrastructure.
What is Azure Image Builder?
Well the answer is… not a lot and certainly nothing manually. This section is to first of all highlight what will be done in the Infrastructure setup script, and then we will go through the steps to execute the script. No one wants to blindly run it without knowing what it is doing…. Right?… Right?…
What will we need to create for the Foundations?
Azure Image Builder is a service that allows you to create custom images in Azure, this is based on HashiCorp Packer. Until recently, Image Templates had to be specified in either ARM (Azure Resource Manager) Templates, BICEP or you could use PowerShell to create your image. However, as of May 2023 there is a new kid on the block, you can now create images in the Azure Portal… see [Part 4] for more information on this.
Azure Resource Group
This will come of no surprise to many, but we will need a resource group to store all of the resources we will create. This will be created in the subscription of your choice, and will have the name you specify with the -aibRG parameter. This will also be used to scope the permissions for the User Managed Identity and the Custom Role.
Custom Azure Role
Azure Image builder requires some specific permissions to be able to manage different aspects of the deployment. Rather than giving it full access to the subscription, we will create a custom role that will be scoped to the resource group we created above.
The role will have the following permissions;
- Microsoft.Compute/galleries/read
- Microsoft.Compute/galleries/images/read
- Microsoft.Compute/galleries/images/versions/read
- Microsoft.Compute/galleries/images/versions/write
- Microsoft.Compute/images/write
- Microsoft.Compute/images/read
- Microsoft.Compute/images/delete
- Microsoft.ManagedIdentity/userAssignedIdentities/assign/action
See the Microsoft Documentation for more information on the permissions.
The Microsoft.ManagedIdentity/userAssignedIdentities/assign/action is not defined in the documentation, but is required when using Azure DevOps for Deployments using this solution.
User Managed Identity
The Azure Image Builder service requires a User Managed Identity to be able to perform the actions required to create the image. This will be created in the resource group we created above, and will be given the name of the resource group with the suffix of -UMI, unless you specify something different with the -identityName parameter.
Once the User Managed Identity has been created, it will be assigned the custom role we created above.
Azure Resource Providers
To support the provisioning of the Azure resources within your subscription, the following resource providers will need to be registered;
- Microsoft.Compute
- Microsoft.Storage
- Microsoft.VirtualMachineImages
- Microsoft.Network
- (Optional) Microsoft.KeyVault – This is only required if you are using a Key Vault to store your secrets.
Documentation can be found on this LINK.
Deploying the Foundations
Now we understand what the script will do, let’s go through the steps to execute the script. The script can be found on my GitHub repository, and can be downloaded from the link below;
The Create-AIBInfrastructure.ps1 script, once executed will install the required PowerShell modules, and then prompt you to login to Azure.
Below is an example of the parameters that can be used to execute the script;
Once the script is executed, you will start to see the resource information in the console;
Once the execution has complete you will have a resource group with the Custom Roles & the User Managed Identity with the Custom Role assigned to it.
Conclusion
Stick around and check our the other parts of the series noted in the introduction, and if you have any questions or comments, please feel free to reach out to me on Twitter or leave a comment below.