Windows 365 Custom Images – Part 4 – Azure AVD UI
Welcome to the fourth (& final… for now) post in the series talking about Windows 365 Custom Images, and how we can use Azure Image Builder to create these images. In this series of posts, we will cover the following topics;
- Part 1 – The Foundations
- Part 2 – PowerShell Deployment
- Part 3 – DevOps Deployment
- Part 4 – Azure Virtual Desktop UI Deployment (This Post)
This has been a long time coming for people not so involved with ARM, BICEP, DevOps or PowerShell as there is now UI Capabilities for you to create your own custom images. You can even use some ‘in-built’ customisation options to give you that extra hand along the way.
This is by far the most manually involved piece, but it is a great way to get started with Azure Image Builder, and then you can start to explore the other options available to you.
So without further ado, lets get into it!
You must still use the Foundation post to create the required resources, as this post will not cover the creation of the required resources.
Permission Requirements
For this post, you will need access to the Subscription and Resource Group created in the Foundations post. During Testing no other permissions were required, but as with everything this may change in the future.
Getting Prepared
Ok, before we start getting into the creating of the template, ensure you have the publicly available links to your resources, even if you are using something with a SAS token or in a storage account, it needs to be accessible from the internet.
If you are using the Managed Identity to get data from a storage account, please ensure that this has the relevant permissions on that account.
Creating the Image
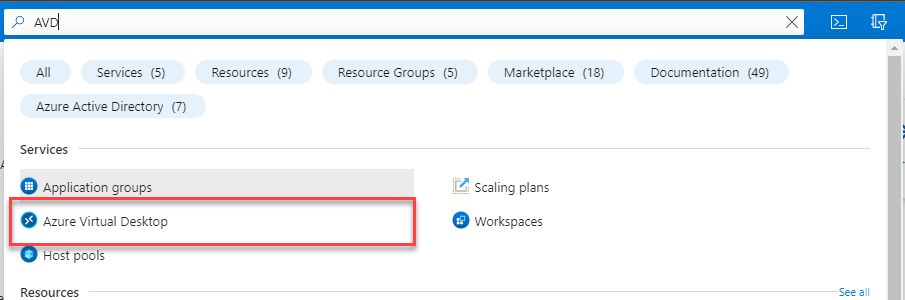
So we are now ready to start creating the image, so let’s head over to the Azure Portal and then head to the Azure Virtual Desktop blade.
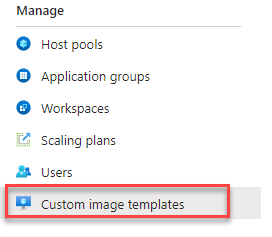
Once you are in the Azure Virtual Desktop blade, you will need to select the Custom image templates option from the left hand menu.
Create a Custom Image
The same rule still applies here, you cannot currently update an image template. However, you will see as you go through the UI Selection options, it will give you the ability to select a previous template to use as a base. We won’t cover that here, but I wanted to make you aware of it.
- Click Add custom image template from the ribbon
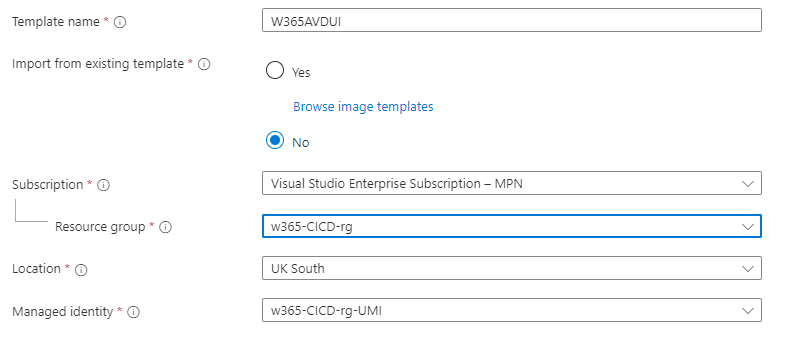
- Enter the follwing information on the basic pane;
- Template Name: The name you wish to call the image template
- Import from existing template: If you have a previous template you wish to use as a base, select it here, other wise select No
- Subscription: The subscription your resource group is in
- Resource Group: The resource group you created in the Foundations post
- Location: The region you wish to deploy the image to
- Managed Identity: The Managed Identity created in the Foundations post
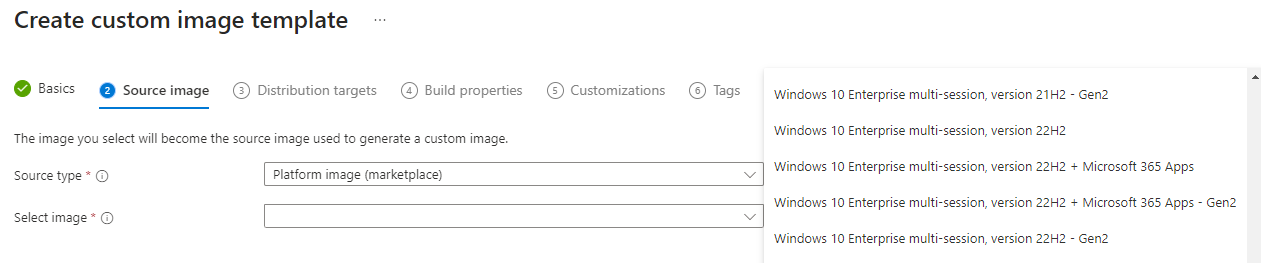
- On the Source Image pane, enter the following details;
- Source Type: For this post we will be using a Platform Image, but if you have other image types you can explore them here.
- Select Image: Select the image you wish to use as a base for your custom image (If you choose a Windows 10 Image, I recommend using the ones appended with Gen2)
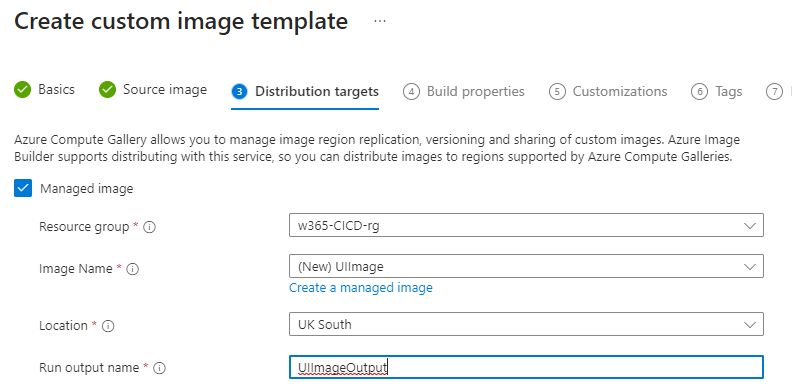
- On the Distribution Targets pane, enter the following details, and then click Next;
- Managed Image: Select this option as this is what we are focusing on in this post
- Resource Group: Select the resource group you created in the Foundations post
- Image Name: The name you wish to call the image
- Location: The region you wish to deploy the image to
- Run output name: The name you wish to call the run output
-
On the Build Properties Pane, we can leave all options as default. However, this is where you could add a VNET, increase the size of the packer VM to improve build speed etc. for now we can just click Next.
-
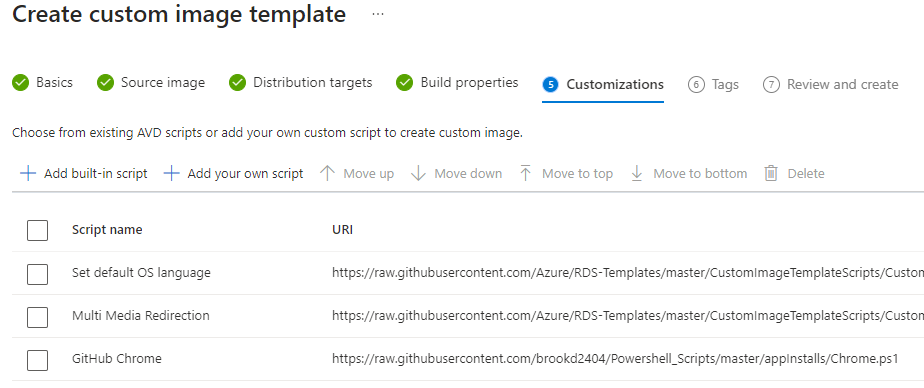
Ok, now we are onto the Customizations pane, this is where you will add in links to your scripts, or use the built-in scripts to help tailor the experience for your needs. Feel free to play around here and then click Next.
-
Add any tags you wish to add to the image, and then click Next.
-
Review the information you have entered, and then click Create.
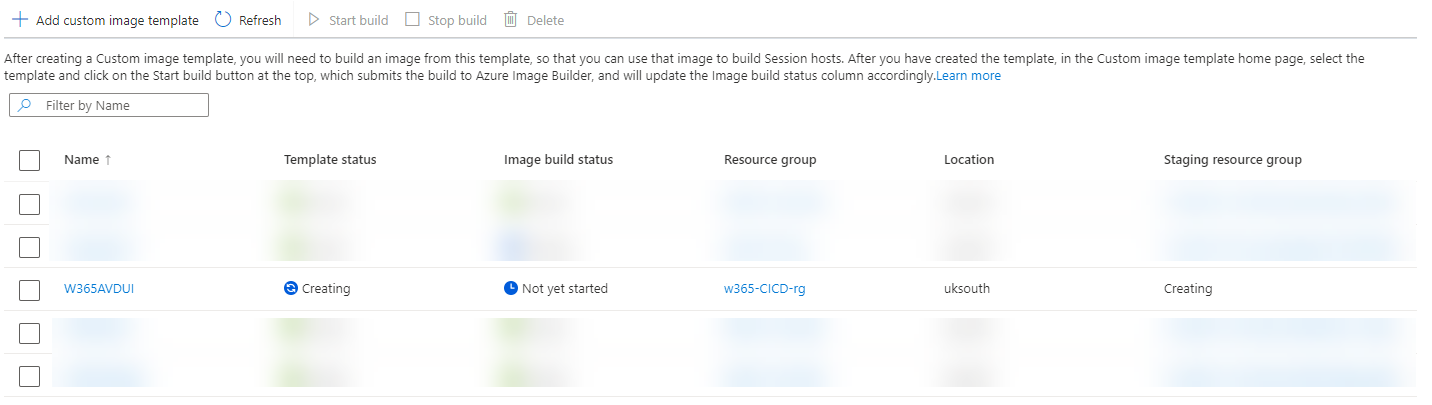
Once you click create, you will be taken back to the Custom Image Templates blade, and you will see your new template being created, this normally only takes a few minutes, but the image is not quite ready at this point.
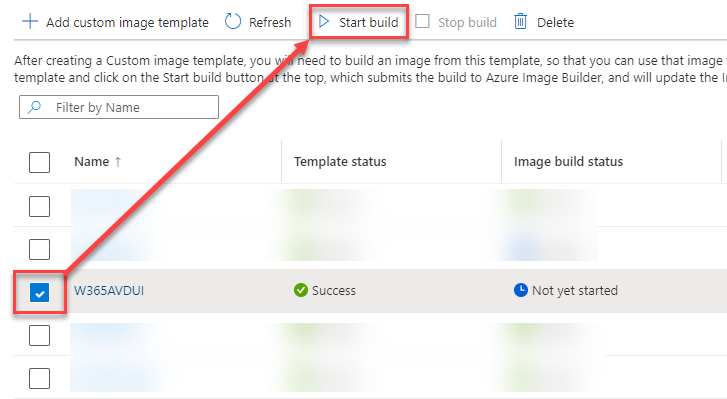
Once the template status changes to to Success, you can select the template and then click Run from the ribbon.
This process creation time can vary, it all depends on the customisations you have added, and the size of the image you are creating, go grab a coffee and come back in a little while.
Uploading the Image to Windows 365
A little while later… we can finally upload the image to Windows 365.
Lets start by heading over to the Intune Console and then head to the Devices Windows 365 blade.
From here we need to select the Custom Images tab, and then click Add from the ribbon. The configuration menu will appear to the right of the screen, where you should enter the following information;
- Image Name: The display name of the image in Windows 365
- Image Version: A version number for the image, I use the date format, for example 22.05.26.
- Subscription: The subscription your image is in
- Source Image: The image you created in the previous section
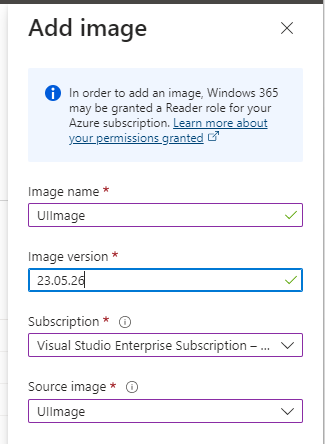
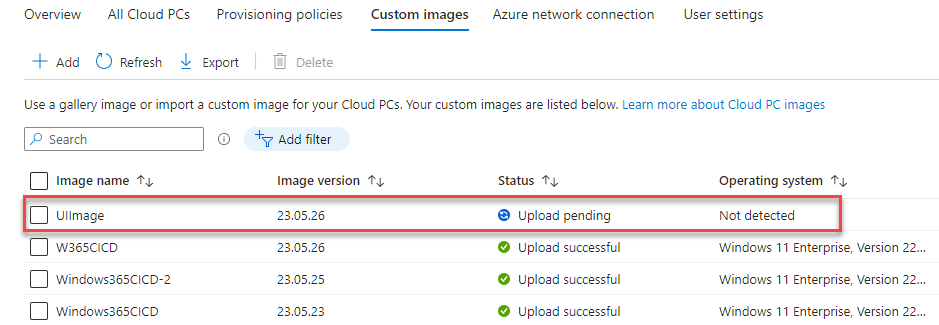
Once you have entered the information, click Add and you will see the image appear in the list, once the upload completes, the status will change to Upload successful and be available for selection in the provisioning policy.
Conclusion
I love that this is now making image creation more accessible to admins, however I find this the most labour intensive process as with the PowerShell and DevOps options, you can automate the process, and not have to worry about checking the status of the image creation & upload.
I hope you have enjoyed this series, and I hope it has helped you on your journey to Windows 365 with Custom Images.
As always, if you have any questions, please feel free to reach ou t to me on Twitter or leave a comment below.
Categories
Tags

Windows 365 Custom Images – Part 4 – Azure AVD UI
Welcome to the fourth (& final… for now) post in the series talking about Windows 365 Custom Images, and how we can use Azure Image Builder to create these images. In this series of posts, we will cover the following topics;
- Part 1 – The Foundations
- Part 2 – PowerShell Deployment
- Part 3 – DevOps Deployment
- Part 4 – Azure Virtual Desktop UI Deployment (This Post)
This has been a long time coming for people not so involved with ARM, BICEP, DevOps or PowerShell as there is now UI Capabilities for you to create your own custom images. You can even use some ‘in-built’ customisation options to give you that extra hand along the way.
This is by far the most manually involved piece, but it is a great way to get started with Azure Image Builder, and then you can start to explore the other options available to you.
So without further ado, lets get into it!
You must still use the Foundation post to create the required resources, as this post will not cover the creation of the required resources.
Permission Requirements
For this post, you will need access to the Subscription and Resource Group created in the Foundations post. During Testing no other permissions were required, but as with everything this may change in the future.
Getting Prepared
Ok, before we start getting into the creating of the template, ensure you have the publicly available links to your resources, even if you are using something with a SAS token or in a storage account, it needs to be accessible from the internet.
If you are using the Managed Identity to get data from a storage account, please ensure that this has the relevant permissions on that account.
Creating the Image
So we are now ready to start creating the image, so let’s head over to the Azure Portal and then head to the Azure Virtual Desktop blade.
Once you are in the Azure Virtual Desktop blade, you will need to select the Custom image templates option from the left hand menu.
Create a Custom Image
The same rule still applies here, you cannot currently update an image template. However, you will see as you go through the UI Selection options, it will give you the ability to select a previous template to use as a base. We won’t cover that here, but I wanted to make you aware of it.
- Click Add custom image template from the ribbon
- Enter the follwing information on the basic pane;
- Template Name: The name you wish to call the image template
- Import from existing template: If you have a previous template you wish to use as a base, select it here, other wise select No
- Subscription: The subscription your resource group is in
- Resource Group: The resource group you created in the Foundations post
- Location: The region you wish to deploy the image to
- Managed Identity: The Managed Identity created in the Foundations post
- On the Source Image pane, enter the following details;
- Source Type: For this post we will be using a Platform Image, but if you have other image types you can explore them here.
- Select Image: Select the image you wish to use as a base for your custom image (If you choose a Windows 10 Image, I recommend using the ones appended with Gen2)
- On the Distribution Targets pane, enter the following details, and then click Next;
- Managed Image: Select this option as this is what we are focusing on in this post
- Resource Group: Select the resource group you created in the Foundations post
- Image Name: The name you wish to call the image
- Location: The region you wish to deploy the image to
- Run output name: The name you wish to call the run output
-
On the Build Properties Pane, we can leave all options as default. However, this is where you could add a VNET, increase the size of the packer VM to improve build speed etc. for now we can just click Next.
-
Ok, now we are onto the Customizations pane, this is where you will add in links to your scripts, or use the built-in scripts to help tailor the experience for your needs. Feel free to play around here and then click Next.
-
Add any tags you wish to add to the image, and then click Next.
-
Review the information you have entered, and then click Create.
Once you click create, you will be taken back to the Custom Image Templates blade, and you will see your new template being created, this normally only takes a few minutes, but the image is not quite ready at this point.
Once the template status changes to to Success, you can select the template and then click Run from the ribbon.
This process creation time can vary, it all depends on the customisations you have added, and the size of the image you are creating, go grab a coffee and come back in a little while.
Uploading the Image to Windows 365
A little while later… we can finally upload the image to Windows 365.
Lets start by heading over to the Intune Console and then head to the Devices Windows 365 blade.
From here we need to select the Custom Images tab, and then click Add from the ribbon. The configuration menu will appear to the right of the screen, where you should enter the following information;
- Image Name: The display name of the image in Windows 365
- Image Version: A version number for the image, I use the date format, for example 22.05.26.
- Subscription: The subscription your image is in
- Source Image: The image you created in the previous section
Once you have entered the information, click Add and you will see the image appear in the list, once the upload completes, the status will change to Upload successful and be available for selection in the provisioning policy.
Conclusion
I love that this is now making image creation more accessible to admins, however I find this the most labour intensive process as with the PowerShell and DevOps options, you can automate the process, and not have to worry about checking the status of the image creation & upload.
I hope you have enjoyed this series, and I hope it has helped you on your journey to Windows 365 with Custom Images.
As always, if you have any questions, please feel free to reach ou t to me on Twitter or leave a comment below.