Windows 365 Custom Images – Part 2 – PowerShell Deployment
Welcome to the second post in the series talking about Windows 365 Custom Images, and how we can use Azure Image Builder to create these images. In this series of posts, we will cover the following topics;
- Part 1 – The Foundations
- Part 2 – PowerShell Deployment (This Post)
- Part 3 – DevOps Deployment
- Part 4 – Azure Virtual Desktop UI Deployment
The first post in the series covered the foundations for all of the deployment methods, and as such, this post will cover the PowerShell deployment method. We will cover additional requirements and what to expect as an output from the script.
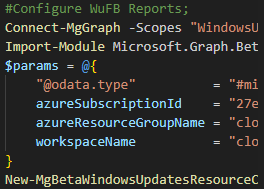
The PowerShell deployment method will not only create the Image, but it will also upload the image to the Windows 365 Service, and then create a new Windows 365 Cloud PC Provisioning Policy, or update and existing policy if one already exists.
The ids in the script are fictitious and for example purposes only, please do not use these in your environment.
Permission Requirements
As we are executing this manually, the Owner permission on the Subscription is not required, you will require the following permissions to execute the script;
- Intune Administrator
- Contributor on the Resource Group where the resources will be created
Getting Prepared
Before we can execute the script, we will need to ensure that we gather all of the information we will need to execute the script and achieve our goal of creating a custom image for Windows 365.
Image Offer and SKU
One of the first things we need to obtain is the Image Offer we will use as our base template. To do so, follow the below steps;
- Obtain the Get-ImageOptions.ps1 script
- Run this script, specifying your Subscription ID, Geo Locations (e.g UKSouth, EastUS etc.) and the Image Publisher (which for this case is MicrosoftWindowsDesktop), as below.
Get-ImageOptions.ps1 -SubscriptionId <Subid> -geoLocation "UKSouth" -imagePublisher "MicrosoftWindowsDesktop"
- Locate the windows-ent-cpc heading, and take note of an image offer you wish to use.
For those wondering, this denotes Windows Enterprise Cloud PC. There are two options for later versions of the OS, which are M365 or OS. To help make your decision, please review the Cloud PC Device images overview documentation.
Image Customisation’s
As you will see in the script, there are three customisation’s, two ‘Inline’ and 1 script URI. Now these are the bits that make your images do the business, there is a bit of trial and error some times, but when you find your groove, it becomes like shelling peas.
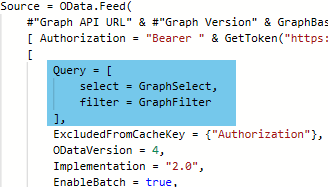
If you search for $ImgCustomParams this will locate the customisation’s. If you add, or remove one, please do not forget to update the $ImgTemplateParams object!, more information on customiser objects in PowerShell can be found HERE.
You can use the Managed Identity to access Azure Storage Accounts for Files, there is documentation on this HERE, this is not in in a PowerShell format but it does outline the concept.
Generation 2 Virtual Machine Templates require both RunAsSystem & RunAsElevated to be set to True. If you do not do this, the image will fail to build.
Executing the Script
Ok, lets get some resources in the over, go grab a coffee, and come back to a fully built image, and a new Windows 365 Provisioning Policy… honestly, this process from start to finish takes longer than 1 hour… Why not use a Windows 365 to do it to avoid any unexpected interruptions 😋😋!!
This script will create a shared image gallery where the image will be built to before creating the Managed disk. This is to also provide additional value in that you can create multiple images in the same gallery, and then use the same image for multiple purposes. For example, you could create a Windows 10 Enterprise image, and then use this for both Windows 365 and Azure Virtual Desktop.
To execute the script, ensure you have added your Customisations and gathered all the information you need to pass into the script, and then execute the script as the below example;
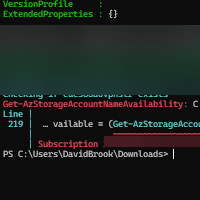
Don’t worry, you will be able to see it is still working though, as the script will check the progress on actions periodically, and output information to the console… I have been there, and I know the feeling of ‘is it still working’ 🤣🤣…
Conclusion
So there you have it, a fully automated (yet Manually Invoked) image build process for Windows 365, and a new Windows 365 Provisioning Policy. Stick around for the next post in the series, where we will cover the Azure DevOps deployment method for a complete hands off approach to deploying your Windows 365 Custom Images.
If you have any questions, please do reach out to me on Twitter or in the comments below.
Categories
Tags

Windows 365 Custom Images – Part 2 – PowerShell Deployment
Welcome to the second post in the series talking about Windows 365 Custom Images, and how we can use Azure Image Builder to create these images. In this series of posts, we will cover the following topics;
- Part 1 – The Foundations
- Part 2 – PowerShell Deployment (This Post)
- Part 3 – DevOps Deployment
- Part 4 – Azure Virtual Desktop UI Deployment
The first post in the series covered the foundations for all of the deployment methods, and as such, this post will cover the PowerShell deployment method. We will cover additional requirements and what to expect as an output from the script.
The PowerShell deployment method will not only create the Image, but it will also upload the image to the Windows 365 Service, and then create a new Windows 365 Cloud PC Provisioning Policy, or update and existing policy if one already exists.
The ids in the script are fictitious and for example purposes only, please do not use these in your environment.
Permission Requirements
As we are executing this manually, the Owner permission on the Subscription is not required, you will require the following permissions to execute the script;
- Intune Administrator
- Contributor on the Resource Group where the resources will be created
Getting Prepared
Before we can execute the script, we will need to ensure that we gather all of the information we will need to execute the script and achieve our goal of creating a custom image for Windows 365.
Image Offer and SKU
One of the first things we need to obtain is the Image Offer we will use as our base template. To do so, follow the below steps;
- Obtain the Get-ImageOptions.ps1 script
- Run this script, specifying your Subscription ID, Geo Locations (e.g UKSouth, EastUS etc.) and the Image Publisher (which for this case is MicrosoftWindowsDesktop), as below.
Get-ImageOptions.ps1 -SubscriptionId <Subid> -geoLocation "UKSouth" -imagePublisher "MicrosoftWindowsDesktop"
- Locate the windows-ent-cpc heading, and take note of an image offer you wish to use.
For those wondering, this denotes Windows Enterprise Cloud PC. There are two options for later versions of the OS, which are M365 or OS. To help make your decision, please review the Cloud PC Device images overview documentation.
Image Customisation’s
As you will see in the script, there are three customisation’s, two ‘Inline’ and 1 script URI. Now these are the bits that make your images do the business, there is a bit of trial and error some times, but when you find your groove, it becomes like shelling peas.
If you search for $ImgCustomParams this will locate the customisation’s. If you add, or remove one, please do not forget to update the $ImgTemplateParams object!, more information on customiser objects in PowerShell can be found HERE.
You can use the Managed Identity to access Azure Storage Accounts for Files, there is documentation on this HERE, this is not in in a PowerShell format but it does outline the concept.
Generation 2 Virtual Machine Templates require both RunAsSystem & RunAsElevated to be set to True. If you do not do this, the image will fail to build.
Executing the Script
Ok, lets get some resources in the over, go grab a coffee, and come back to a fully built image, and a new Windows 365 Provisioning Policy… honestly, this process from start to finish takes longer than 1 hour… Why not use a Windows 365 to do it to avoid any unexpected interruptions 😋😋!!
This script will create a shared image gallery where the image will be built to before creating the Managed disk. This is to also provide additional value in that you can create multiple images in the same gallery, and then use the same image for multiple purposes. For example, you could create a Windows 10 Enterprise image, and then use this for both Windows 365 and Azure Virtual Desktop.
To execute the script, ensure you have added your Customisations and gathered all the information you need to pass into the script, and then execute the script as the below example;
Don’t worry, you will be able to see it is still working though, as the script will check the progress on actions periodically, and output information to the console… I have been there, and I know the feeling of ‘is it still working’ 🤣🤣…
Conclusion
So there you have it, a fully automated (yet Manually Invoked) image build process for Windows 365, and a new Windows 365 Provisioning Policy. Stick around for the next post in the series, where we will cover the Azure DevOps deployment method for a complete hands off approach to deploying your Windows 365 Custom Images.
If you have any questions, please do reach out to me on Twitter or in the comments below.