Windows 365 – Graph API and PowerShell Basics
This article was composed using Windows 365 Enterprise licences, the experience may differ if using Windows 365 Business.
Windows 365 is still a relatively ‘New Kid’ on the block, however it is developing at a rapid pace, with the technology now been used behind the scenes of DevBox. Windows 365 offers the ability to deploy machines at scale for the workforce without having to worry about the underlying maintenance within data centres etc.
In this post we will look at some of the basics using the Graph API natively, and also the Microsoft Graph PowerShell Module. We will look at SKUs and Provisioning Policies, and by the end of this article you should be able to deploy your Windows 365 profiles with ease.
Prerequisites
To get started you will need the following;
- Visual Studio Code (or another IDE)
- The following PowerShell Modules
- Microsoft.Graph
- MSAL.PS
Assumptions
There is an assumption made that you as the system administrator have the necessary permissions to perform the actions mentioned.
Connecting to the Graph API
As we will be covering two different way of interacting with the service, we will look at two types of authentication. First up, we will look at how to obtain a bearer token (Access Token) for use with direct endpoint invocation (using PostMan or Invoke-RestMethod), followed by the simplicity of connecting to the Microsoft Graph Module.
If your organisation restricts creating applications from Azure, you may need to take additional measures to be able to authenticate.
Bearer Token (Access)
This is where the MSAL.PS module is required, you can create your own Azure AD App Registration for this, however for this guide I will utilise the Microsoft PowerShell App Registration with defined scoped.
- Launch a PowerShell Prompt
- Enter `$Token = Get-MsalToken -ClientId d1ddf0e4-d672-4dae-b554-9d5bdfd93547 -Scopes CloudPC.ReadWrite.All -RedirectUri “urn:ietf:wg:oauth:2.0:oob”`, hit Enter
- Sign In, If not already consented, you will be prompted with an image as below. You can choose to grant for yourself or your organisation if you have the permissions.

If you now call `$Token.AccessToken`, this will be the bearer token we will use.
If you call `$Token.ExpiresOn` you will be able to see the lifespan of the token, this is usually 1 hour.
We will come back to using this further down the article, as at the moment we just need to get connected.
Microsoft.Graph PowerShell Module
- Launch a PowerShell prompt
- Enter `Connect-MgGraph -Scopes CloudPC.ReadWrite.All`, hit Enter
- Sign in, If not already consented, you will be prompted with an image as below. You can choose to grant for yourself or your organisation if you have the permissions.
That’s it, no Redirect URI’s or Client App ID’s to remember, just clean authentication.
Making your first call
These methodologies can be used across the Graph API, by amending the scopes, URIs (for Access Tokens) and using alternate Microsoft.Graph Module commands.
This section will cover how to make your first Graph API Call, in this instance we will be listing all of the Windows 365 (Cloud PCs).
Bearer Token (Access) Method
Using this method is great for more advanced users, but it have its pitfalls none-the-less, for example, the Graph API does have a limit on the amount of resources it returns before adding in a @odata.NextLink to the return. So to cover this scenario, I will talk about two ways to make this call, that way you have all of tools you need.
Basic Call
If you look at the code snippet in the Basic Call collapse below, you will see its already commented for ease. The basic premise of this is to build up the call using an object so you do not have a long winded command to run.
So lets look at the `$GraphParams` object, firstly, as you can see we are making a `GET` request, to the `URI` with a set of specified `Headers`.
You will see within the `Header` object, that we are calling `$Token.AccessToken` to place the Bearer token in the authorization header.
If you take a look at the demonstration below, you will see that this returns the devices that you have within your environment.
Handling Next Links
I won’t dig into this too much as its a nice bonus, the premise is the same, however with the addition of an array and a while loop this code snippet will recursively gather your data.
Microsoft.Graph Call
The first thing we need to do before running any commands is call `Select-MgProfile -Name beta` to ensure we do not run into any issues.
To achieve the same as above with the Microsoft.Graph module is run `Get-MgDeviceManagementVirtualEndpointCloudPC`
Let take a look at how this looks shall we?
Handling Next Links
You will be flabbergasted how complex this is… Honestly. All you need to do is add the `-All` parameter.
Building the basics
Now we can authenticate and have run our first call, lets put some of those skills into practice and create a provisioning policy.
Microsoft.Graph Module
For this basics blog, I am only going to focus on using the Microsoft Hosted Network and AzureAD Joined devices.
Let get going shall we, one of the first things we need to do is select what gallery image we want. There are two types of images, OS Optimized (`light`) in terms of the Graph API and Microsoft 365 Apps (`heavy`). For this example we will be using the `heavy` type.
If we first run `Get-MgDeviceManagementVirtualEndpointGalleryImage` it will list the available image on the gallery, but there can only be one for the import. So lets filter to a specific image using `Where-Object `. This will return the Windows 11, 22H2 Microsoft 365 image as shown in the preview below. So lets assign the whole command to an `$galleryImage` variable.
`$galleryImage = Get-MgDeviceManagementVirtualEndpointGalleryImage | Where-Object `
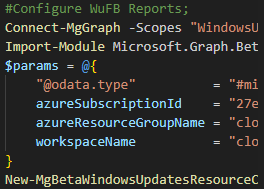
Now we have our selected image, we can create a very basic provisioning policy. If you look inside the Create Provisioning Policy below you will see the code snippet which will create you provisioning policy.
As mentioned, we will only be focusing on AzureAD Joined machines, as you can see below when you specify you want it AAD only, you will need to specify a region.
After creating our provisioning policy, we will want to assign this to an Azure AD Group, for this you will need the `ObjectID` of the group. Once you have the ID, you can amend the code snippet below to add the assignment.
I would advise using group based licensing and using that group to assign the provisioning profile to, as that way the machine will provision when a user is dropped into that group.
Native Endpoints
So now we have fleshed this out with the PowerShell module, lets take a look at doing this with using your access token and the native endpoints.
I will break this down in the collapse sections below, One of the things that you will notice is that on the creation of the provisioning policy and the assignment snippets, we switch from a `GET` to a `POST` method and we also add in the `ContentType = “application/json”` property to ensure the policy gets created without any errors.
Next Steps
Now you have the provisioning policy effectively ‘as code’, you can put this together in a PowerShell Script and create consistent deployments.
If you want to provision a machine, ensure the user has a license assigned (Direct or Group Based) and is within Scope of the provisioning policy.
At the time of writing this article, a user can only provision devices using a one provisioning policy. For example, if you have a CloudPC provisioned with `Demo1Policy` but you then assign `Demo2Policy` and another Licence SKU, the new SKU will provision with `Demo1Policy`.
Conclusion
I hope this article has been useful for you, there is also a link below to a script that contains the snippets used in this article.
Further Reading
Categories
Tags

Windows 365 – Graph API and PowerShell Basics
This article was composed using Windows 365 Enterprise licences, the experience may differ if using Windows 365 Business.
Windows 365 is still a relatively ‘New Kid’ on the block, however it is developing at a rapid pace, with the technology now been used behind the scenes of DevBox. Windows 365 offers the ability to deploy machines at scale for the workforce without having to worry about the underlying maintenance within data centres etc.
In this post we will look at some of the basics using the Graph API natively, and also the Microsoft Graph PowerShell Module. We will look at SKUs and Provisioning Policies, and by the end of this article you should be able to deploy your Windows 365 profiles with ease.
Prerequisites
To get started you will need the following;
- Visual Studio Code (or another IDE)
- The following PowerShell Modules
- Microsoft.Graph
- MSAL.PS
Assumptions
There is an assumption made that you as the system administrator have the necessary permissions to perform the actions mentioned.
Connecting to the Graph API
As we will be covering two different way of interacting with the service, we will look at two types of authentication. First up, we will look at how to obtain a bearer token (Access Token) for use with direct endpoint invocation (using PostMan or Invoke-RestMethod), followed by the simplicity of connecting to the Microsoft Graph Module.
If your organisation restricts creating applications from Azure, you may need to take additional measures to be able to authenticate.
Bearer Token (Access)
This is where the MSAL.PS module is required, you can create your own Azure AD App Registration for this, however for this guide I will utilise the Microsoft PowerShell App Registration with defined scoped.
- Launch a PowerShell Prompt
- Enter `$Token = Get-MsalToken -ClientId d1ddf0e4-d672-4dae-b554-9d5bdfd93547 -Scopes CloudPC.ReadWrite.All -RedirectUri “urn:ietf:wg:oauth:2.0:oob”`, hit Enter
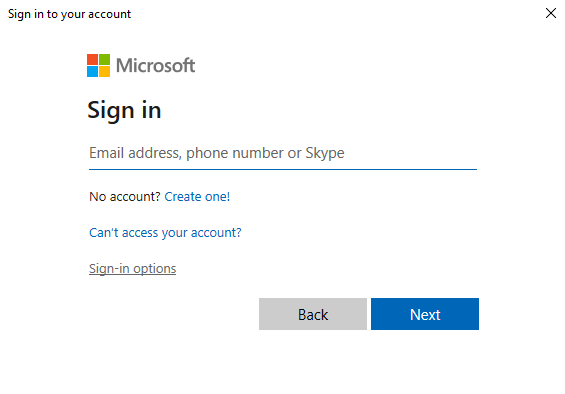
- Sign In, If not already consented, you will be prompted with an image as below. You can choose to grant for yourself or your organisation if you have the permissions.
If you now call `$Token.AccessToken`, this will be the bearer token we will use.
If you call `$Token.ExpiresOn` you will be able to see the lifespan of the token, this is usually 1 hour.
We will come back to using this further down the article, as at the moment we just need to get connected.
Microsoft.Graph PowerShell Module
- Launch a PowerShell prompt
- Enter `Connect-MgGraph -Scopes CloudPC.ReadWrite.All`, hit Enter
- Sign in, If not already consented, you will be prompted with an image as below. You can choose to grant for yourself or your organisation if you have the permissions.
That’s it, no Redirect URI’s or Client App ID’s to remember, just clean authentication.
Making your first call
These methodologies can be used across the Graph API, by amending the scopes, URIs (for Access Tokens) and using alternate Microsoft.Graph Module commands.
This section will cover how to make your first Graph API Call, in this instance we will be listing all of the Windows 365 (Cloud PCs).
Bearer Token (Access) Method
Using this method is great for more advanced users, but it have its pitfalls none-the-less, for example, the Graph API does have a limit on the amount of resources it returns before adding in a @odata.NextLink to the return. So to cover this scenario, I will talk about two ways to make this call, that way you have all of tools you need.
Basic Call
If you look at the code snippet in the Basic Call collapse below, you will see its already commented for ease. The basic premise of this is to build up the call using an object so you do not have a long winded command to run.
So lets look at the `$GraphParams` object, firstly, as you can see we are making a `GET` request, to the `URI` with a set of specified `Headers`.
You will see within the `Header` object, that we are calling `$Token.AccessToken` to place the Bearer token in the authorization header.
If you take a look at the demonstration below, you will see that this returns the devices that you have within your environment.
Handling Next Links
I won’t dig into this too much as its a nice bonus, the premise is the same, however with the addition of an array and a while loop this code snippet will recursively gather your data.
Microsoft.Graph Call
The first thing we need to do before running any commands is call `Select-MgProfile -Name beta` to ensure we do not run into any issues.
To achieve the same as above with the Microsoft.Graph module is run `Get-MgDeviceManagementVirtualEndpointCloudPC`
Let take a look at how this looks shall we?
Handling Next Links
You will be flabbergasted how complex this is… Honestly. All you need to do is add the `-All` parameter.
Building the basics
Now we can authenticate and have run our first call, lets put some of those skills into practice and create a provisioning policy.
Microsoft.Graph Module
For this basics blog, I am only going to focus on using the Microsoft Hosted Network and AzureAD Joined devices.
Let get going shall we, one of the first things we need to do is select what gallery image we want. There are two types of images, OS Optimized (`light`) in terms of the Graph API and Microsoft 365 Apps (`heavy`). For this example we will be using the `heavy` type.
If we first run `Get-MgDeviceManagementVirtualEndpointGalleryImage` it will list the available image on the gallery, but there can only be one for the import. So lets filter to a specific image using `Where-Object `. This will return the Windows 11, 22H2 Microsoft 365 image as shown in the preview below. So lets assign the whole command to an `$galleryImage` variable.
`$galleryImage = Get-MgDeviceManagementVirtualEndpointGalleryImage | Where-Object `
Now we have our selected image, we can create a very basic provisioning policy. If you look inside the Create Provisioning Policy below you will see the code snippet which will create you provisioning policy.
As mentioned, we will only be focusing on AzureAD Joined machines, as you can see below when you specify you want it AAD only, you will need to specify a region.
After creating our provisioning policy, we will want to assign this to an Azure AD Group, for this you will need the `ObjectID` of the group. Once you have the ID, you can amend the code snippet below to add the assignment.
I would advise using group based licensing and using that group to assign the provisioning profile to, as that way the machine will provision when a user is dropped into that group.
Native Endpoints
So now we have fleshed this out with the PowerShell module, lets take a look at doing this with using your access token and the native endpoints.
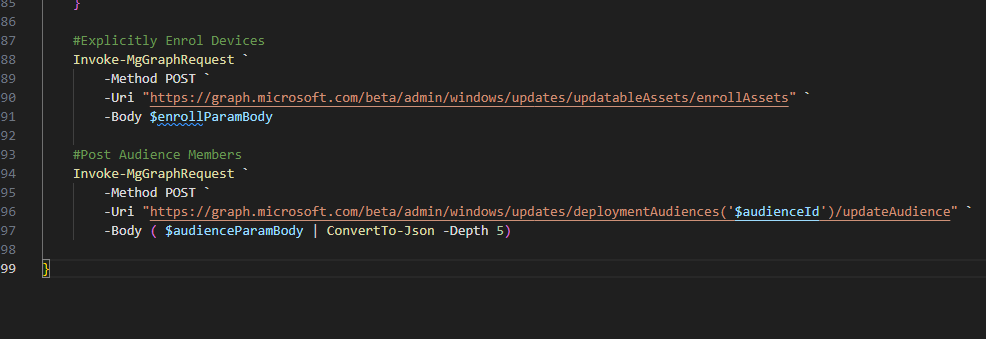
I will break this down in the collapse sections below, One of the things that you will notice is that on the creation of the provisioning policy and the assignment snippets, we switch from a `GET` to a `POST` method and we also add in the `ContentType = “application/json”` property to ensure the policy gets created without any errors.
Next Steps
Now you have the provisioning policy effectively ‘as code’, you can put this together in a PowerShell Script and create consistent deployments.
If you want to provision a machine, ensure the user has a license assigned (Direct or Group Based) and is within Scope of the provisioning policy.
At the time of writing this article, a user can only provision devices using a one provisioning policy. For example, if you have a CloudPC provisioned with `Demo1Policy` but you then assign `Demo2Policy` and another Licence SKU, the new SKU will provision with `Demo1Policy`.
Conclusion
I hope this article has been useful for you, there is also a link below to a script that contains the snippets used in this article.